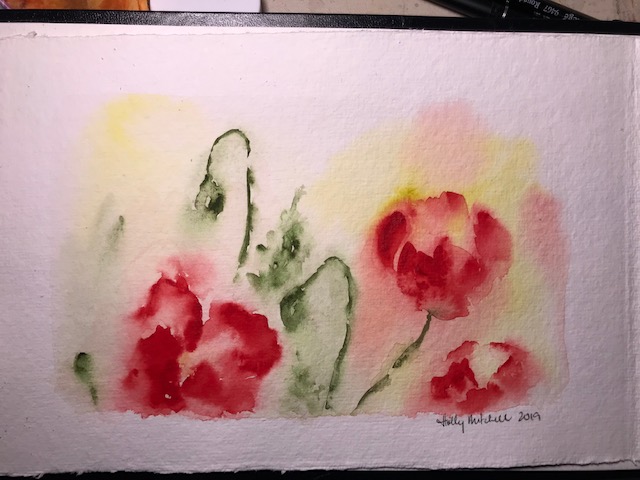
Okay, actually Watercolor Flowers, but if you have ever pressed flowers, they may remind you of pressed flowers. The petals become thin and delicate like that… of course, I followed a youtube video to do these flowers!!
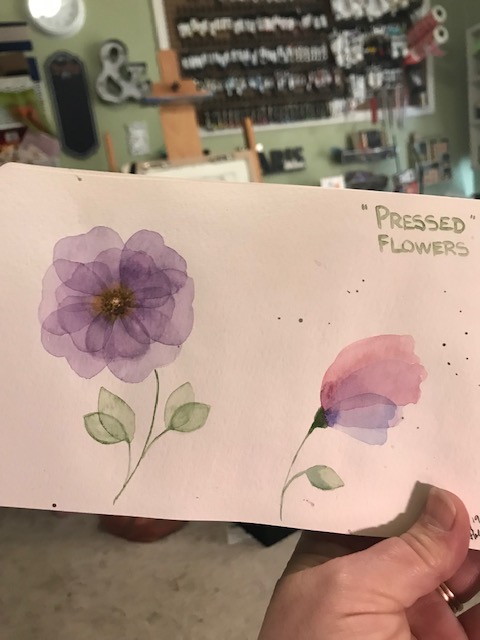
A 365 day art project… one drawing a day

Okay, actually Watercolor Flowers, but if you have ever pressed flowers, they may remind you of pressed flowers. The petals become thin and delicate like that… of course, I followed a youtube video to do these flowers!!

A. Gallo and Daniel Smith watercolor, moleskin watercolor journal… sketch idea from this“Drawing Wiff Waffles” Youtube Video… well, I borrowed the basic figure pose from the idea she discarded…
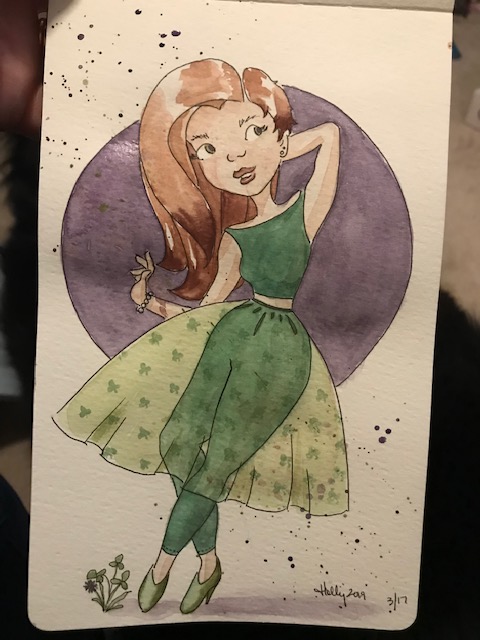
You can’t see it here, but the purple is DS Amethyst Genuine, and has actual amethyst sparkles in it. Pretty! Maybe I’ll add a streak or two of sparkly copper to her hair as well. I think she’s dancing.

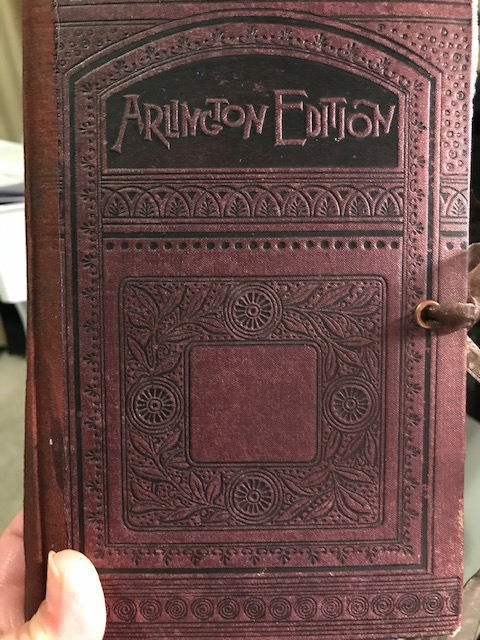
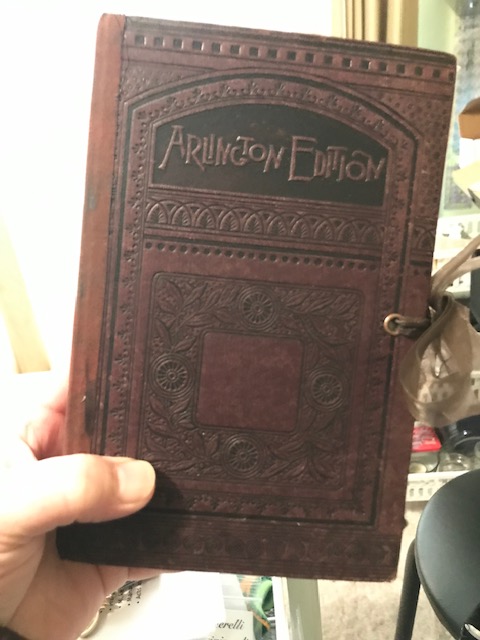
I just copied the design on the cover. 🙂 A.Gallo’s watercolor “Morellone” came in very handy. (I use A. Gallo paints for the whole thing… but particularly that color, a nice thick deep PR101.)
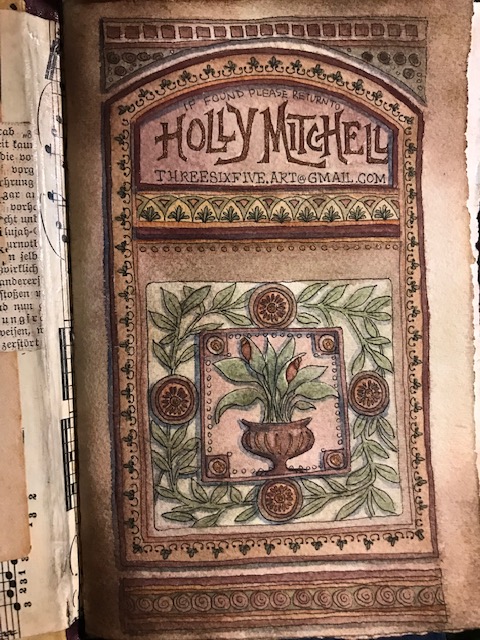
A little shimmery copper color here and there:
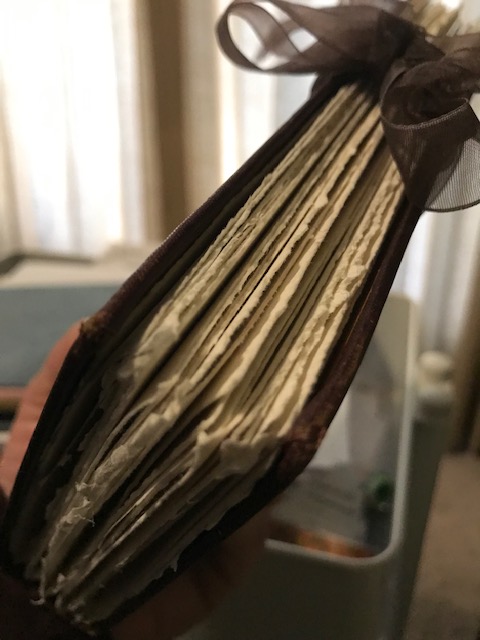
My binding job looks worse and worse to me. But… I still love it. 🙂
You can see the original post HERE, showing how I made the journal.

(this post includes Amazon affiliate links where applicable)
I watched some youtube videos by Nik the Booksmith (here is a link) about making handmade journals. (I had also watched one by Following the White Rabbit, (link to watercolor journal tutorial here) which is what actually inspired me to think about it!) Between the two artists, I started to think, Hey, maybe I can do this, too! I will readily admit, I sometimes rush, or cut corners, so have been hesitant to try what seems like a tedious and precise job.
My final result is gorgeous!! It isn’t quite RIGHT… but I love it. And maybe that’s what counts, right? Plus, as I make more, I’ll learn how to make them more “right”. 🙂
So, I’ll try to explain what I did. However… watching the two videos I’ve linked (and Nik the Booksmith’s is actually a five part series) will definitely make it clear to you. (Plus… well, mine isn’t quite RIGHT, so going to the original sources may make yours RIGHTER.)
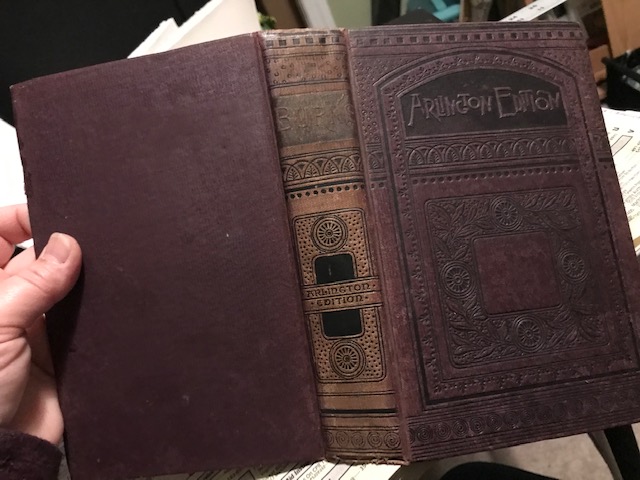
Step one: I had a very old, but damaged, copy of Robert Burns poetry. VERY old. Beautiful. BUT DAMAGED. Please remember that. (I know some of you don’t like people tearing up books for art, which I frequently do.) So, following “Nik”‘s directions, using an exact knife, I removed the pages from the book, being careful to keep the cover completely intact. (You don’t have to use a book cover. You can use heavyweight paper, cardstock, and Following the White Rabbit shows how to make it without a cover at all!)
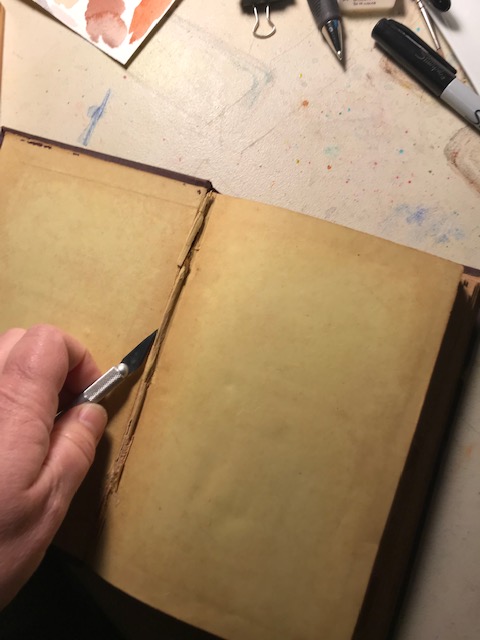
I’m not left handed. But, my right hand was holding the camera. I need a camera stand. 🙂
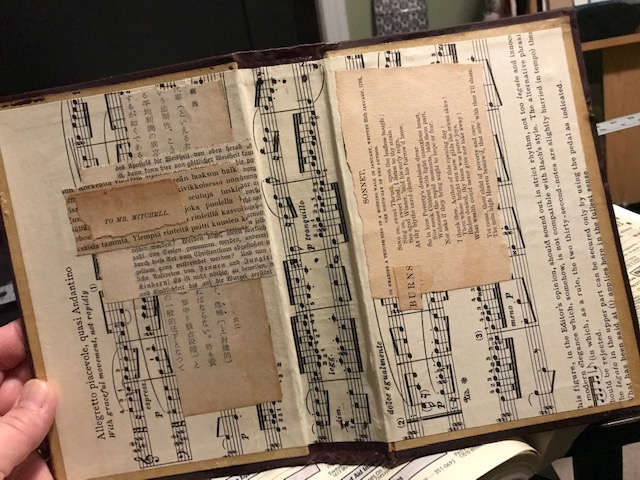
Next, I took an old, yellowed piece of sheet music I had, and cut it to fit as a lining, being sure it would be able to go down inside the spine as well. This will offer a bit of strength to the aged spine. I think, looking back, I could have used two layers for this, or maybe even fabric, for extra security. I covered the inside of the book covers and spine in tacky glue, and began in the center, covering the spine first, and using my finger and my bone folder to make sure the paper touched every bend of the cover. It needs to be very close fitting to allow freedom of movement without damage. Then pressing the paper down right to each edge (I also used a clean, flat paint brayer to help me smooth it out)
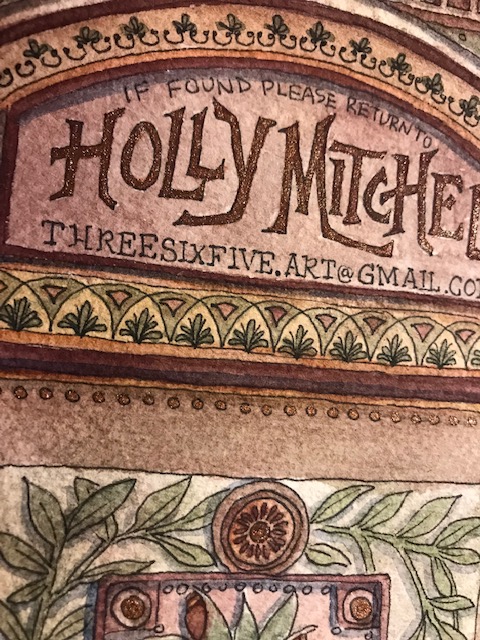
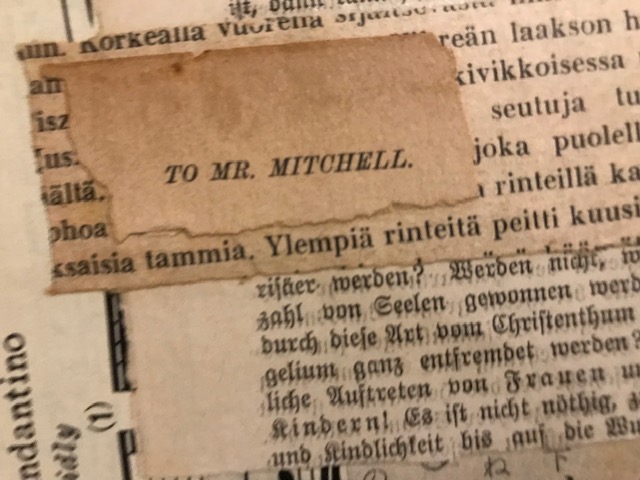
I also added a few interesting bits of vintage foreign pages I had, and one of Burns’ poems. AND a little title reading To Mr Mitchell. Sort of dedicating the book to my husband. 🙂
As it dried, I measured a large piece (22’x30″) of 140 lb Arches watercolor paper, (five sheet set found here on Amazon), and tore it the sizes I thought I’d need (watch Following the White Rabbit for this part) I couldn’t remember how many pages she said to use in each signature. I thought she had said 4, I used 3. Two would have been better. Try two. I scored and folded each, using a scoring tool I have for card making. I’m linking the tool on Amazon here. They have cheaper brands, this just happens to be the one I have, and I love it. The others may be just as nice. I tried to score the pages in such a way that I’d have front sides and back sides together, so the open book would have the same surface, left and right sides. I’m not sure I was entirely successful? I recommend you lightly mark the front of EACH piece you cut or tear BEFORE you cut or tear it, to avoid the confusion I suffered. I regretted not doing that.
You don’t have to use watercolor paper. You can use any paper you have! I specifically want a watercolor journal.
(I ended up using a sheet and a half for this book. You can definitely make a book using only one sheet. At less than $10 a sheet, that’s a decent deal. Looking around, you may find better prices on large watercolor sheets. If you want to shop around, try Cheap Joes, Jerry’s Artarama, Wet Paint Art… you could also use sheets you already have there in a pad, just remember it will be folded, so half the size in one direction.)
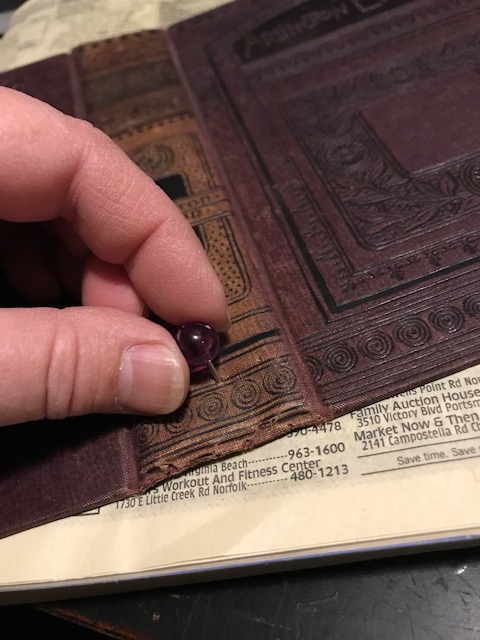
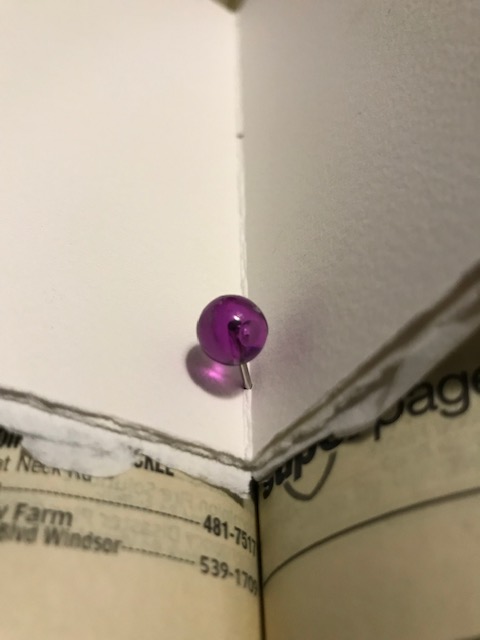
Once the book cover was dry, I arranged my signatures (the groups of pages which would be together.) I started with three signatures, each having 3 sheets (folded. So six pages) I later added two more signatures of two pages each between them, because I had left too much empty space between them. I made a paper template so I’d make holes in the same places on both pages and cover,
and I used an old phone book beneath my cover to poke holes. No awl in sight, so I used a push pin. Worked fine!


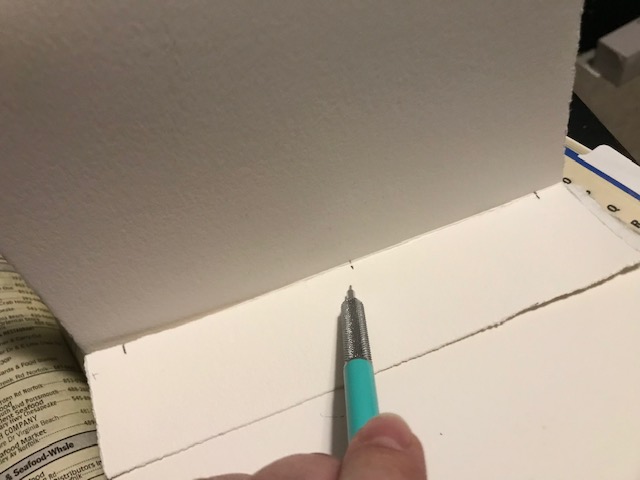
I started making my marks inside, but then realized it was so busy inside I couldn’t really see if I was lining things up straight, so I switched to making marks outside. I totally followed Nik the Booksmith for this part, and the rest, although I plan to use Following the White Rabbit’s process another time. Both were so easy to understand.
I made the marks in my first signature, then slid it down into the crack between the pages of the phone book to make the hole:
I used bakers twine to sew, and a needle. I started with a smaller-impossible-to-thread version for the first set, and ended up with a darning needle eventually.
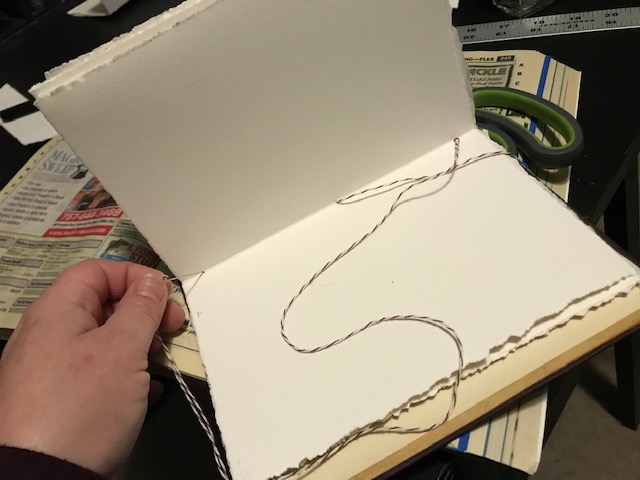
To sew a signature in, I had made three holes in each signature, and corresponding holes in the book spine. I started in the center hole, and went down through the spine, leaving a nice long tail (several inches). Then brought it up through the bottom hole of the spine, into the bottom hole on the signature. Still leaving that long tail inside! I then went up to the top hole, down through it and through the top hole of the spine. Then BACK in through the center hole of the spine and center hole of the signature. I tightened everything, being careful not to pull too tight and break my string. (This is a lie. I did break my string. It only happened once, though, and I fixed it. Don’t pull it too tight) Once it felt nice and taught, the long string going up the center of the signature should feel almost like a guitar string, I tied the two ends. I cut the string but left both ends hanging. She suggests in the video gluing some little paper punches or something to the strings, and I may do that, or may shorten them later.
Now I repeated for all the signatures, exactly the same way.

This went much more quickly than I had anticipated. The whole book was made in a day.
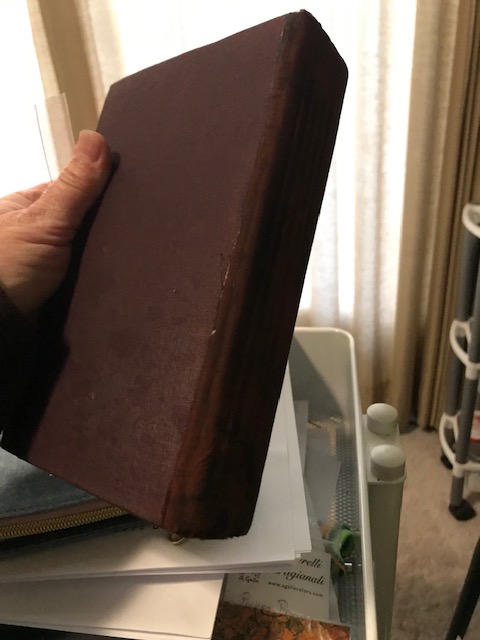
Now I took a piece of fabric, cut it to fit the outside spine of the book, and glued it on. Too be honest, I almost left it. It was a pretty spine, and I didn’t mind the strings much. If I had used dark thread that matched the cover I really wouldn’t have minded. But I decided the fabric might offer strength and protection. The color fabric I had (I didn’t purchase ANYTHING for this project, I used supplies I had on hand) nearly coordinated with the book, but was a little bright. I inked it up with Ranger black Distress Ink, and couldn’t believe how well it now matched! I glued it on with Tacky Glue.

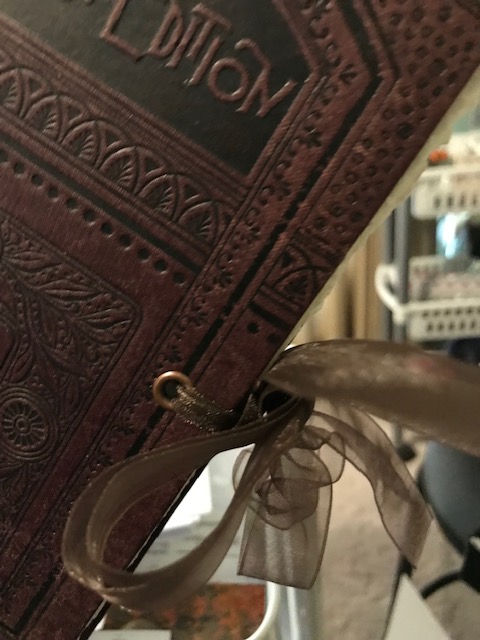
Now my only problem… kind of a funny one. My book didn’t have too many pages, but my signatures did! So… it wouldn’t stay closed!!
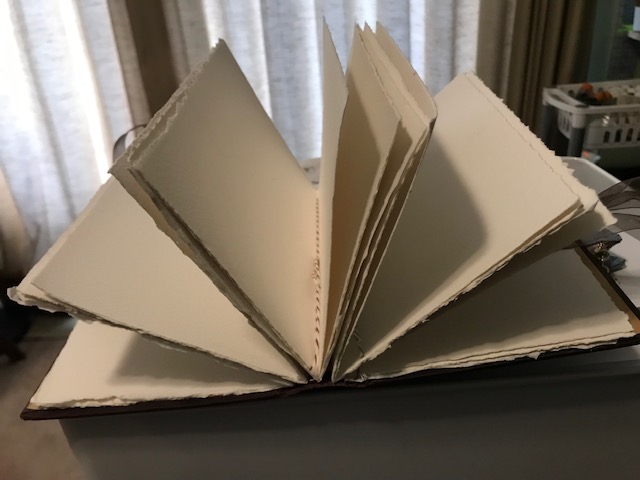
I watched another of Nik’s ideas where she use her Cop-a-dile to attach grommets… I realized I have that same tool!!! So… I attached grommets and tied ribbon on, tied the book shut, and voila!! Oh! It’s gorgeous. I love that the torn edges aren’t even. This would have looked awful if I had cut them straight, but knowing I would have accuracy issues, I tore.

Soon I’ll show you the title page I’m working on!! I haven’t decided if this is a themed book, or if I just add anything I feel like at the time, or if it is my next daily journal.
I’m so glad I tried, even though it is imperfect, and obviously a first attempt. Give it a shot!! Link a photo if you can. I’d love to see!!


Norfolk, Virginia has mermaids everywhere. They all have the same silhouette, are (more or less) ‘life-size’, and are decorated individually. This one inside MacArthur Center has always fascinated me. It has “bites” carved out of its tail, and is wrapped in silver foil, to look like a foil covered chocolate mermaid. There used to be a Godiva store in the mall, (Heaven on earth, imo) and this mermaid is titled Go Diva, with a little poem beneath it.
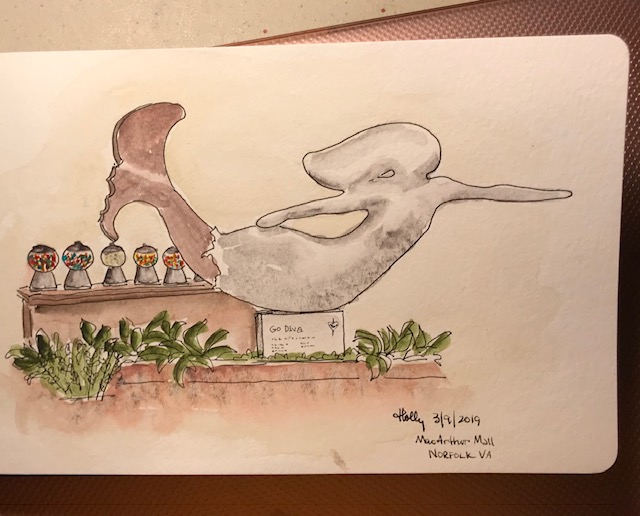
I brought shiny silver paint for the foil, but then wasn’t sure about shading on top of it. I want to try it again, though, so maybe next time I’ll try the shiny. (Although I was pretty satisfied with the way the Daniel Smith Bloodstone worked)

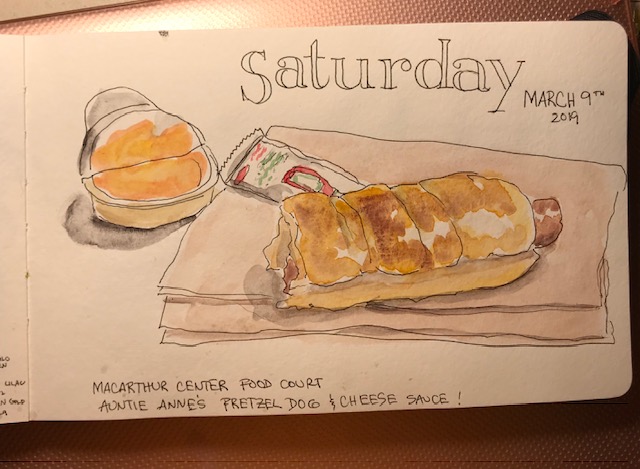
I went to MacArthur Center in Norfolk today for a little indoor urban sketching… which I’ll post tomorrow. But for today, finally another journal entry. 🙂 Auntie Anne’s pretzel dog. A much tastier indulgence than I expected it to be.

(This post has affiliate links)
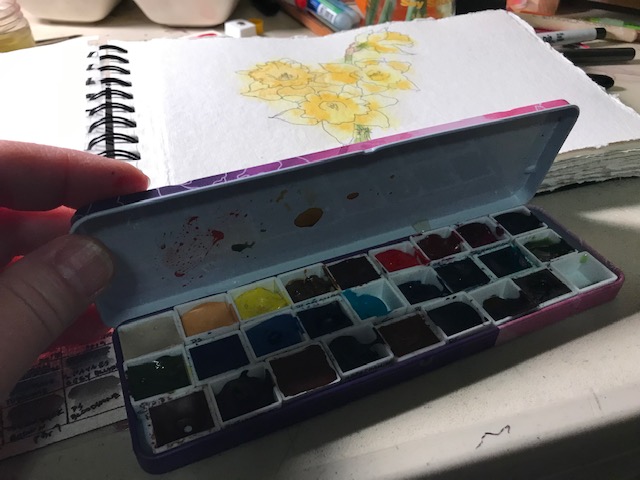
So after watching “Following the White Rabbit” set up her palette on Youtube, I was inspired to look around and see if I had a similar sized tin. I found two. One is a Pentalic drawing pencil tin, the other BARELY larger, a Sketchbook watercolor pencil tin. The tiny bit of size difference allowed the Sketchbook tin to close perfectly over my half pans, and fit an extra row of pans, too (or brushes, if I prefer, later) Plus, it’s pink and cute.
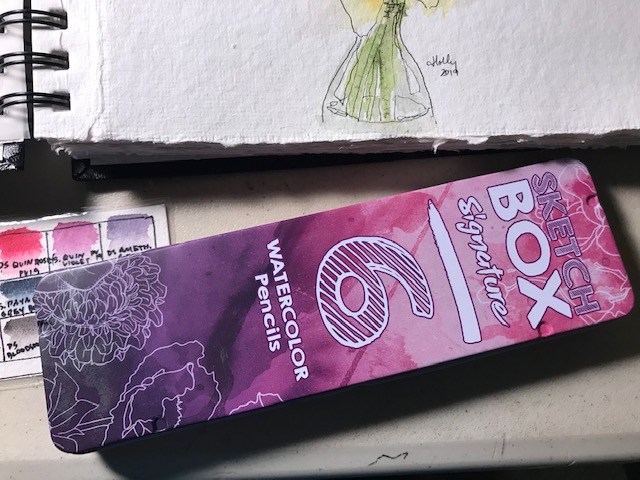
It’s slim, lightweight, already painted white inside, and EXACTLY holds three rows of 9 half pans, so I can use it in the studio or out and about. I filled it with lots of Daniel Smith, a few Schmincke, 2 QoR, and even one A.Gallo paint.

(yeah this is what my table generally looks like)


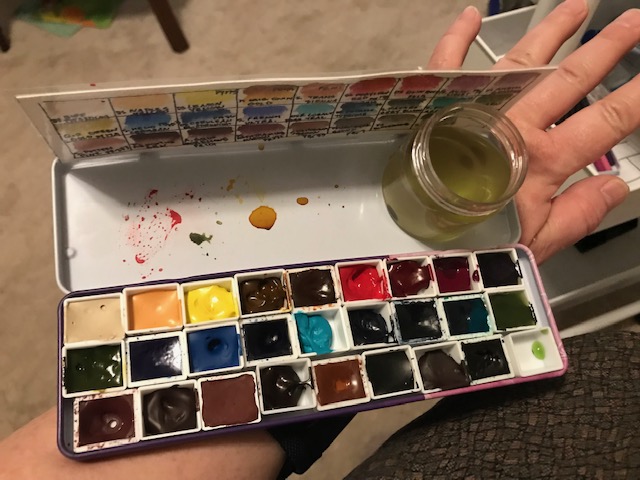
I ordered THIS magnetic tool wristband from Amazon for under $10. (Arrived in two days… bless you, Amazon) Some of the other bands’ reviews said the magnets weren’t strong enough, so check reviews carefully if you don’t get this same one… this one is quite strong enough for my needs! (You see where I’m going with this?)


I added super strong little magnets (Found HERE on Amazon) to a little plastic cup with a screw on lid, and to the bottom of a swatch card I made of the colors in my palette, set the whole thing on my wrist and was ready to try a painting… (I use E 6000 glue because I have it… there may be other glue that works for these magnets as well. Somehow between December 1st and today I have used 99 of these little magnets!)
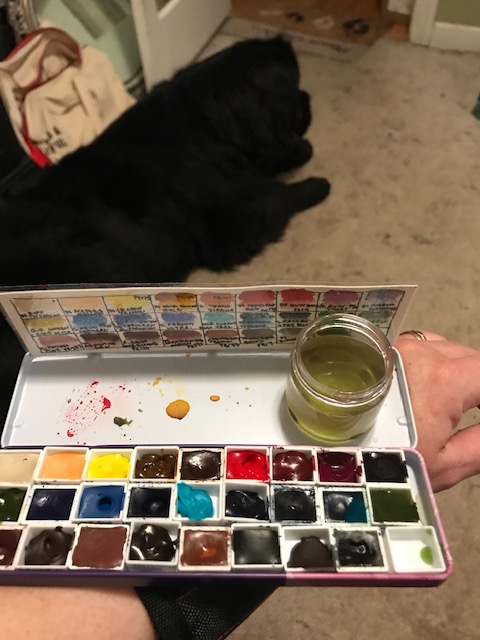
This worked great, and I THINK might be even better once I take it “on location” somewhere, because I’ll have my etchr bag with me to rest my arm on! It would fit ANY size tin, and I have much smaller ones if I want to use them instead, but this tin is very lightweight.

So what do you think? Love the idea, or hate it? What type of things have you tried to make plain air or urban sketching more convenient?
-Indigo watercolor journal (I like the paper, I don’t like the spiral binding), Daniel Smith paint (Perylene red, lemon yellow, quin gold, green apatite, Uniball Micro Deluxe pen

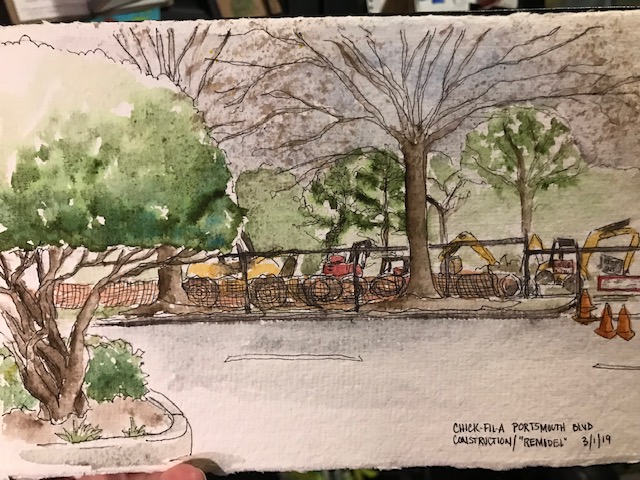
A gray, rainy day calls for urban sketching from the comfort of my little brown Beetle. On the ring of a mall in Chesapeake, they’ve torn down the Chick-fil-A, to rebuild it. The scene is more interesting than I’ve portrayed it here.

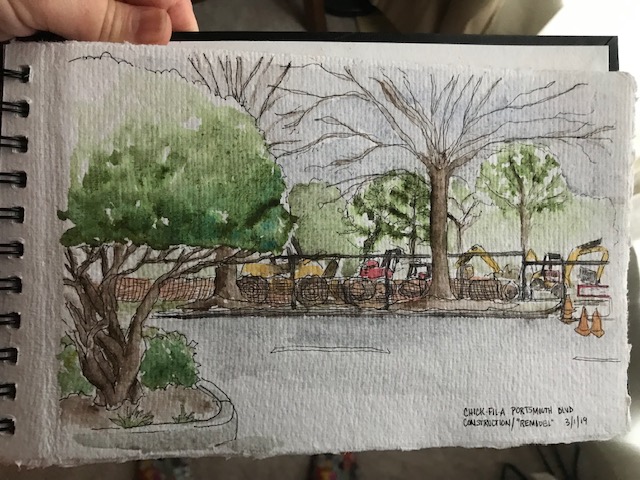
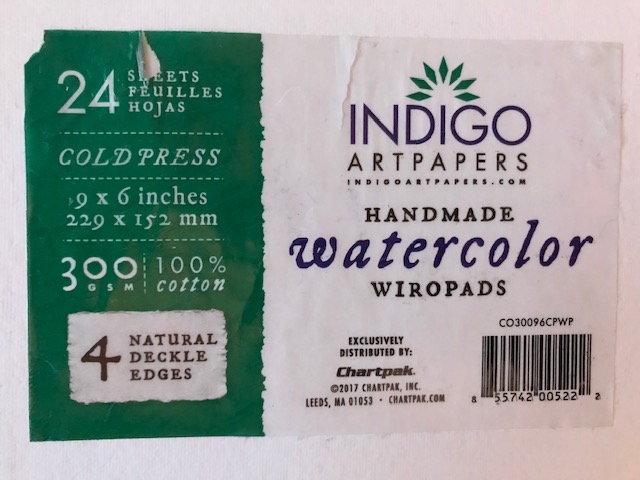
This is Daniel Smith watercolor, in an Indigo handmade watercolor “wiropad” (linked here)…
(I’ve linked it to Amazon, but I noticed it is about $4 more now than when I purchased it.)
It is 100% cotton paper with a deckled edge. Nice flair! I had a little trouble deciding which was front or back of a page. I’ve decided to try using both sides and see how it does.
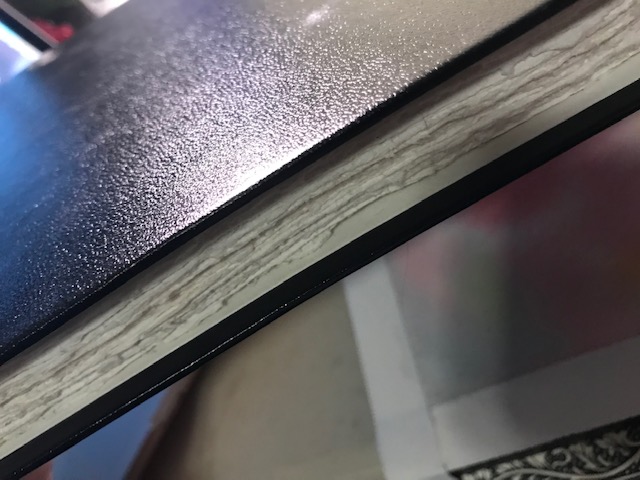
And an interesting trait… I don’t know if you can see, but it gets thinner along the edge with the wire binding, so the page can be removed and have a deckled edge along all four edges. Kinda cool.
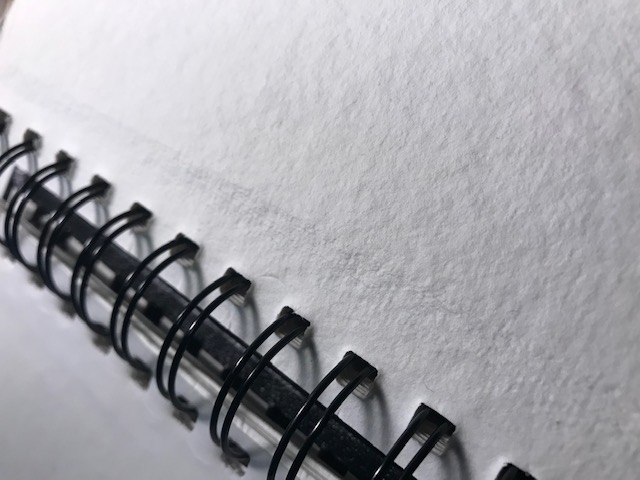
Also, there’s a piece of parchment (or something) between each page:
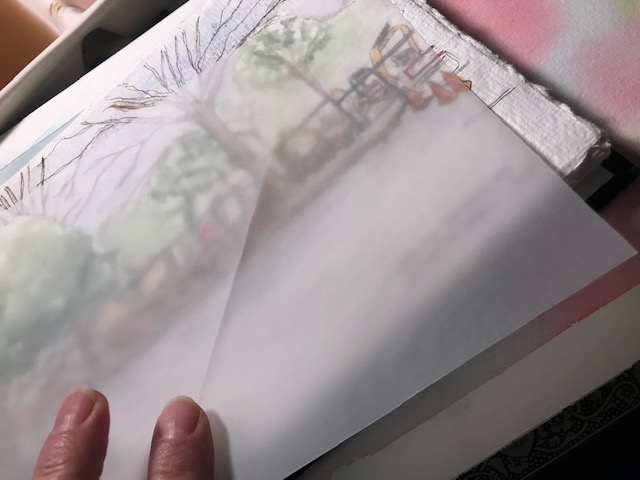
This book is 9×6″… I think there’s also a 12×9″ book. I like the paper (so far)… quite thick and sturdy. Strong texture… almost too much texture for using a pen to outline, at least it would be if I wanted every tiny line perfect.
I’m not that enthusiastic about a spiral binding, in general… but if you want to be able remove a page, or all pages, this might be worth looking at. The covers are very thick and sturdy. The book itself is quite thick, heavy and bulky for carrying around, but the quality paper may be worth it. A soft cover with the same paper might be really awesome! I plan to use this to the end, so we will all see how well it holds up!
One bad thing, they put a large sticker on the cover. Unattractive and difficult to remove. I gently pried it off and put it inside the back cover. Decided it was the front cover, so peeled it off to move it, but it messed up the paper inside the cover. So I put it back. 🙂
I may replace it with an ID label, but it’s the only place the name is on the book, so I’m leaving it for now. That’s one thing I love about shopping through Amazon… if I forget the name of something I purchase, I just look in my history. (I use this feature often!)
I am an Amazon Affiliate, so I receive a tiny percentage on purchases made through my links, without any increase in price to you, the purchaser, and I appreciate your support. (I don’t think you have to purchase the exact item I link (although honestly I’m not certain) for it to count, and I use the little bit Amazon sends me to purchase extra watercolor supplies now and then. (Yeah, Amazon saw me coming. They knew they’d just be getting it back)

Angela Fehr has been offering a free livestream “beginning watercolor bootcamp” this week, February 27, 28, and March 1st, Wednesday, Thursday, and Friday (tomorrow). It isn’t much hands on, but she shares a lot of good information. You can find the recorded sessions still on youtube, I think.
Wednesday we made a background.
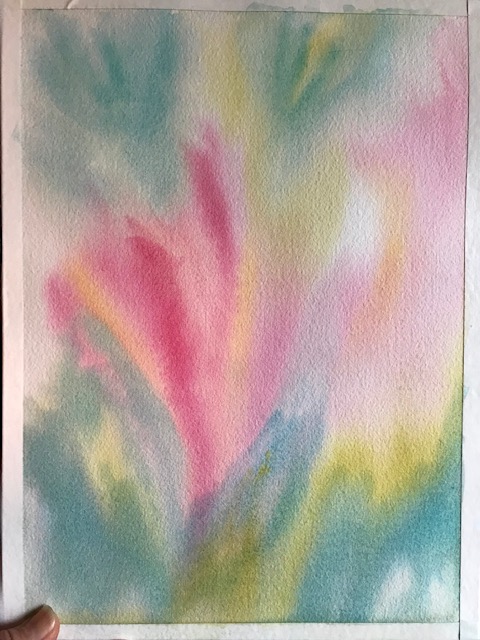
(Arches cotton watercolor pad, 140 lb, cold pressed… DaVinci paints… except the blue, which is EEM, DaVinci Casaneo brush, size 2)
(PS, these brushes are new… reviewed on youtube by Teoh Yi Chie, a popular urban artist I follow. These are synthetic round quill brushes, but you’d never guess they aren’t animal hair. They are excellent brushes, so far. They hold so much water, as much as animal hair, and keep a beautiful point, but are large enough to do a lot with. I ordered the size 2 and size 0… the 2 is about like a round 8, I’d guess. I’ve linked them on Amazon, and I get a few cents on purchases, but they keep the price the same for you. I haven’t looked anywhere but Amazon, though (I bought through Teoh’s link!) so you might want to shop around a bit and see if there’s a better price somewhere)
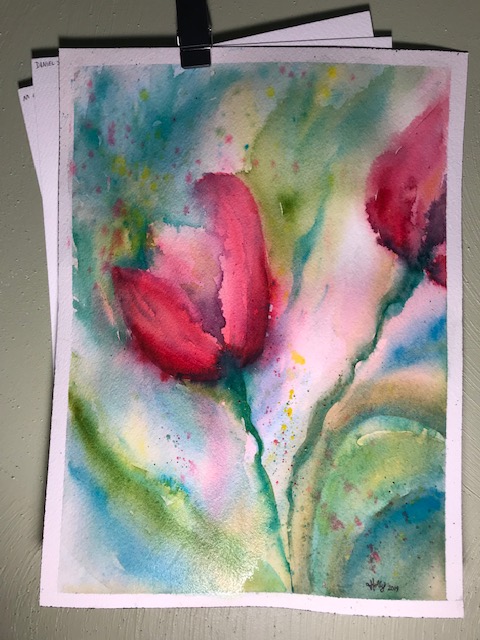
Today Angela added a tulip blossom and gave some suggestions about technique… but kind of left us hanging with the rest of it. (What??? I have to paint on my own?? 🙂
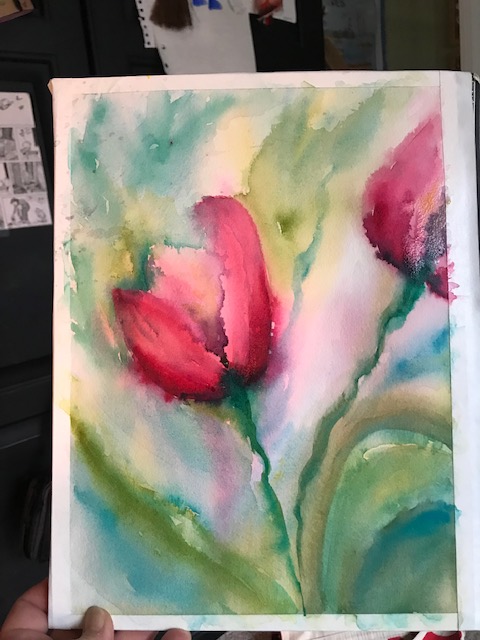
I let it dry, then came back to a bunch of water spots I hadn’t noticed, in the top left corner, so I added some splashes of color. Maybe not an improvement, and not perfect, but I like it. Painting loosely is a real challenge for me.
I’m considering taking her 6 week watercolor mastery course. (This is kind of a teaser for that one) If I do, you’ll be able to follow along with my progress, and see if it’s something that might interest you next time she offers it!

I purchased this 4×6 Pentalic Accordion Fold Dream Catcher Watercolor sketch book January 6th, for $7.99. I was afraid to start it! I’d seen a youtube artist, Drawing Wiff Waffles, do a very cute scene in it, and just couldn’t think how to use it. In the end, it fit PERFECTLY inside the tiny zipper bag I wanted to take for my art supplies on my trip to California recently. AND, it had exactly the right number of double pages, using both front and back, for a title page, and one double page per day! (I included the Amazon link for the book, but there’s also a drawing book instead of watercolor book, if you prefer. The regular pentalic watercolor journals are very nice, too!)
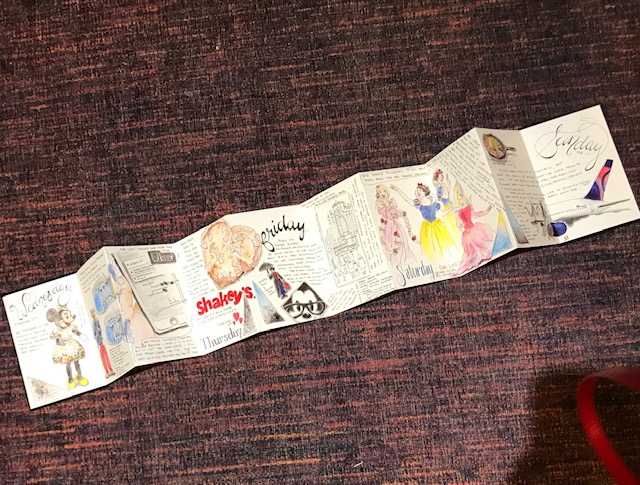
It was Fabulous using it. I loved it!! I could bleed my design over a bit to the next page if I wanted to, but I didn’t have to. It was inexpensive enough I didn’t stress too much (as you’ll see from my entries!!) and the small pages meant I could capture something, but didn’t have to spend much time on anything. (well, some of it I finished at home, anyway)
I didn’t get a shot of the edge, but very thin… maybe 1/4 inch thick?

How cute is that??
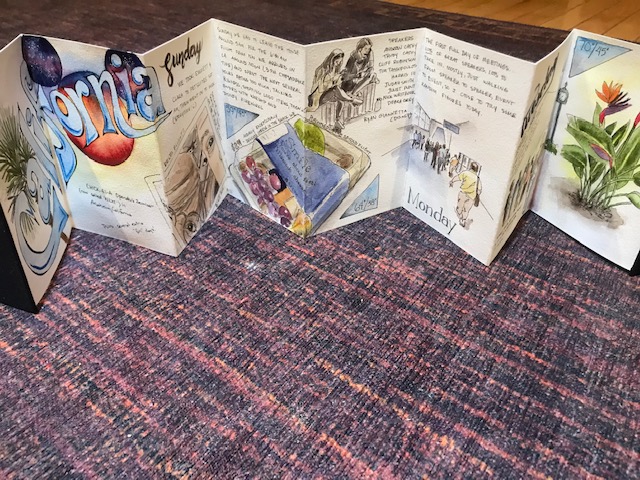
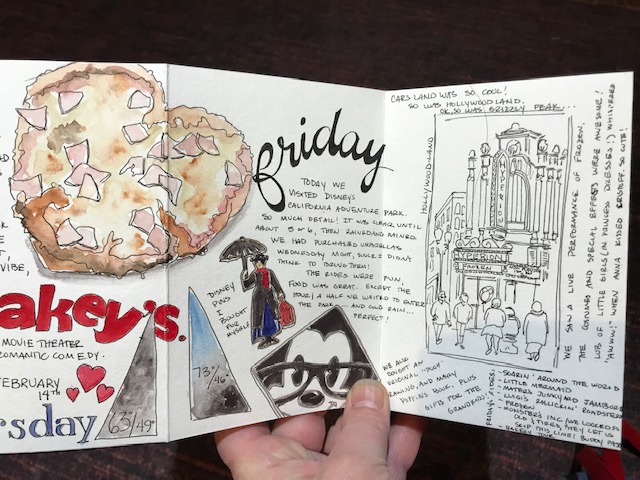
Title page: That’s supposed to be a sunset, shaped like mickey’s iconic ears… the top ones got a little solar-system-ish.

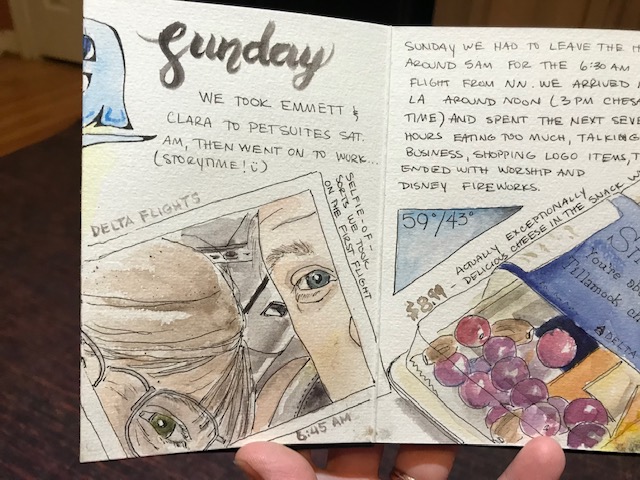
My favorite two pictures were done on the plane… a “selfie” of me and Mark in our seats on the plane, and a picture of the fruit and cheese tray we bought in flight. (actually really delicious!)
We went on business, so I tried some random seminar-people-shots…
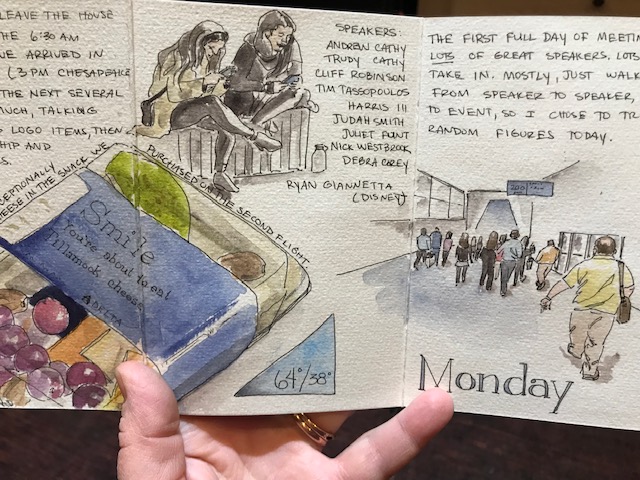
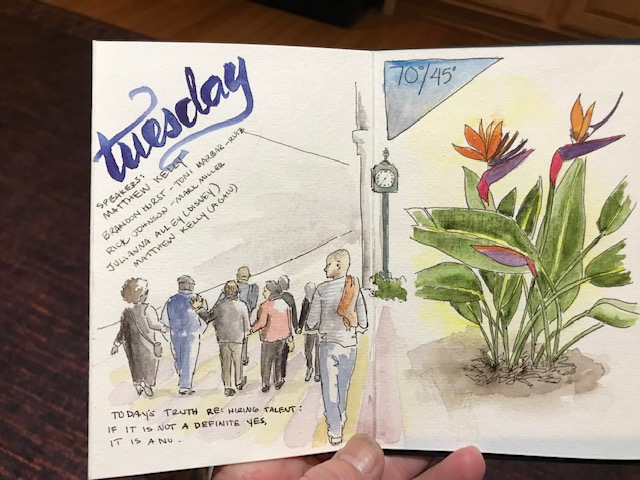
More random folks walking to a big meeting (7000 people! You’d think I could have drawn more people in that group…) and a random hotel plant. I later met two of the people walking 4 in a line… the two on the left had such great outfits on! A lot of personality. Not that the two on the right DIDN’T… but I felt like I was meeting celebrities when I met the two on the left, and wanted to tell them I’d drawn them! But, then it occurred to me, that may not make a great first impression. My husband already knew them, so maybe it is less creepy than it seems??
Wednesday morning brought the final seminar meetings, from afternoon on we were on our own. Disneyland! It rained, but just enough to keep (normal) people away. And we saw Minnie. (Also, my favorite new shoes)

Using Uber for the first time was a big deal! It was supposed to rain all day, and did a bit in the middle, so we went to a very cool little area of town for lunch (super cool, and yet I drew an uber map instead???) and went to a movie. It was Valentines Day! We also got a heart shaped Shakeys pizza delivered. I was SOOOO excited, because I loved Shakeys as a kid and literally can still taste it. Sadly… it is not the same recipe. Not bad, but different 😦 The salad was excellent, though!

Friday at Disneyland’s California Adventure. VERY fun park. Small. Prone to crowding. Great. (Rained a bit) I bought some pins.
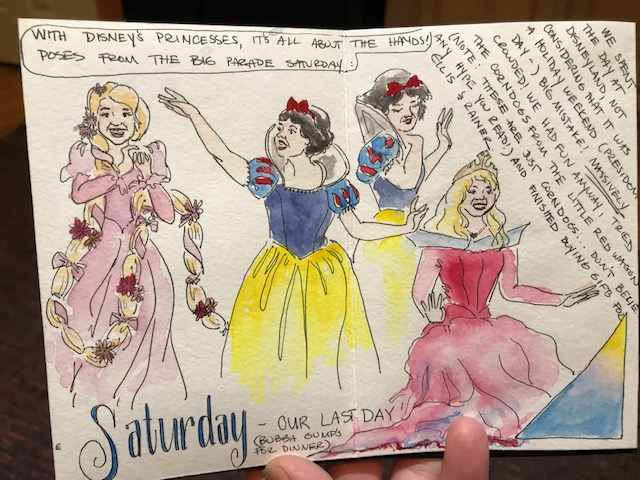
Saturday, no rain. Sun, sun, sun! Oh, and guess what we hadn’t realized??? A holiday weekend. Yeah. So really absolutely miserable at Disneyland. I’m glad we went a bit Wednesday night. Captured some Disney princess hands at the big parade… (the ladies were prettier than this, sorry ladies.)
Saturday night’s dinner made it onto this page, and not much more.
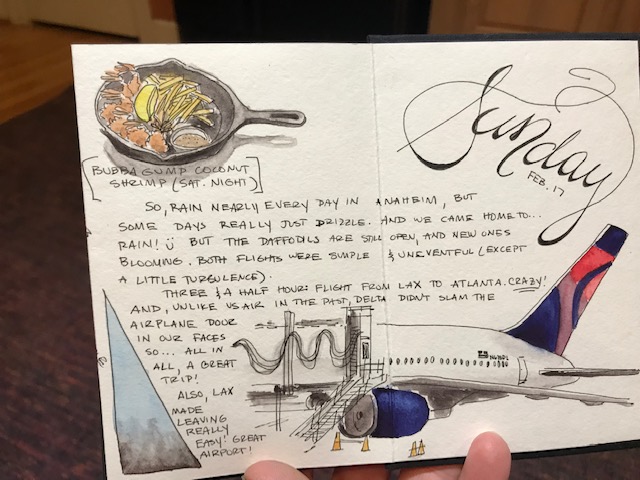
(Also… when did a flight from west coast to east coast become three hours long???? That’s crazy! And awesome.)
I apologize for waiting so long to post this. Honestly, it wasn’t as gorgeous as I’d imagined it, and so I put it off!! Put it is great fun to look at. Maybe I’ll do another for some of the memories I didn’t include! I highly recommend this for a short trip or a themed book. Low commitment and lots of fun to use.
If you follow the link I made at the top, I do get a few cents on each purchase made, but Amazon doesn’t charge any more. If you find it cheaper somewhere else, link it below for us! What would you use this accordion journal for?
