6/03/18 Day 3, 30×3- gouache clouds

gouache

[gwahsh, goo-ahsh]
noun
  1. a technique of painting with opaque watercolors prepared with gum.
  2. an opaque color used in painting a gouache.
  3. a work painted using gouache.

(“A WORK PAINTED USING GOUACHE”? Really? How can you define a word using the word itself as a key point in the definition?)

Wikipedia defines it more fully: “similar to watercolor in that it can be re-wetted, it dries to a matte finish, and the paint can become infused with its paper support. It is similar to acrylic or oil paints in that it is normally used in an opaque painting style and it can form a superficial layer. Many manufacturers of watercolor paints also produce gouache and the two can easily be used together.” Basically, it is like an opaque watercolor paint.

Gouache is weird. I wasn’t a fan a year ago, but I think I may like it now.

IMG_1149

June 2, 2018: Day 2 30×30- Galaxy

The month of June I hope to do 30 paintings in 30 days… even if most are teensy and in my journals. I’m following citizensketcher.com, and really I think the idea is plain air painting… but I have been so lazy lately I think any attempt with paint is going to work for me.

Schmincke watercolor in Stillman & Birns Beta Series pocket journal.

IMG_1147

June 1, 2018! Playing with masking fluid

I watched a Youtube tutorial by Makoccino (seen below, and linked here)

I used EEM (Eventually, Everything Mixes) and QoR watercolor paints, and my tiny Stillman and Birn Beta Series pocket journal.

IMG_1023

And then tried the ideas on my own yesterday. Here are my results:

IMG_1140

IMG_1141

IMG_1142

IMG_1143

This is a very small journal, and a kind of flattish masking fluid pen, AND the middle of the page tore beneath the fluid on the flower one.

This was a simple, quick, relaxing (except the tearing page) exercise. Thanks, Makoccino!

Cephalopodic Solar System? (May 31, 2018)

I am in an interesting swap on Swap-bot.com, a very fun artistic swapping site. I’ve made some amazing friends there and met some incredible artists, too. This swap will have 8 parts… each person will decorate 1/8th of every participant’s plain canvas tote bag, one at a time, as they circle the group. Anything goes. It should be an interesting tote bag I receive back! The swap is international, so a little expensive for those of us in the US sending to Europe, but at least the expense of shipping is spread out over a long time.

It turns out, staring at a blank canvas bag which will end up with someone I don’t know is rather daunting!! I don’t want to paint something she hates. I peeked at her profile to get some ideas, and saw “cephalopods” on her list of “likes”… I’m not sure how the planets came into being, I just thought they’d be kinda cool. So I ended up with an octopus either orchestrating, designing, or destroying the universe, depending upon your point of view, and current mood. 🙂 Or really, maybe just playing around with it.

IMG_1038


IMG_1039

What do you think? I kinda love him. Her? I may need to try a larger paper version to keep. Or several different versions.


5/29/2018- watercolor journal tour

I found my missing watercolor journal! The one I apparently lost last September or so and then forgot about. I didn’t realize it was missing until I found it yesterday. And I found the white wrist sweatband I was telling you about last week, that I wrap around my travel palette and use to wipe my brushes on. AND a travel palette I’d looked for a few times this winter. YAY!! The journal is less than half finished, but the pictures in it are so cute, I thought I’d give you a little tour.

My beetle, and garage:

IMG_0995

a friend’s adorable house, and a partial window (the window was a Peter Sheeler youtube tutorial):


IMG_0994

A group of random girls walking arm in arm down Duke of Gloucester Street in historic colonial Williamsburg… so cute…

IMG_0989

and my husband and Emmett: newfie(dog) (before we got the second one) [dog, not husband]…

A few historic colonial buildings:

IMG_0993

Sitting in the rain at my son’s college graduation,

IMG_0992

my sister-in-law laughing with my grandson, goats climbing a goat tower. (seems random, I know, but these are all memories from 2017 and it is so fun to see them again!)

IMG_0990

A peacock (specifically to try some shiny shimmery gold paint):

IMG_0991

my granddaughter looking at a horse on the little farm behind my house (which they’ve torn down this month to develop into a neighborhood!), and the farm in color:

IMG_0988


I’m so glad I have these memories. This experience has convinced me I need to sketch and paint more of my day to day events, places, people I interact with. It really means more to me than I thought it would. And as horrible as my memory is (and it IS!!!), I remember EACH of these scenes clearly, the real actual moment they are from. So drawing them must have cemented them into my brain differently than just taking a photo.

And just for kicks, here is Emmett watching television. So you can see how huge-ish he is really getting. I think he’s gotta be about 140 pounds now.

9cMX+eoyT0uO5WLc7rBAmg


Pocket Sized Business-Card-Holder Paint Palette (5/28/18) (CUUUTE)

I’m sending this sweet little palette all the way to Germany. I’d like to think because it is tiny it will be inexpensive to send… however, it will travel as a “parcel” or “package” so is likely to cost $15-$20. (Ridiculous? But, that IS a long way…) Still, isn’t it cute???? Why are tiny things cute???

I fit SIXTEEN separate colors in here! Obviously it isn’t a ton of each paint but it is plenty for a sample palette, which is what I’m sending out. I was thinking if there is any interest maybe sometime I’ll offer some type of cute little sample palette here as a prize? Maybe not the same exact type, I have LOADS of fun little tins.  (Let me know in the comments if you’d be interested)

I started by shopping on eBay, Amazon, and Dollar Tree. This palette was nice and CHEAP to make. I spray painted inside the top cover with my white enamel paint, to create a tiny mixing area. Then I used Dollar Tree eye makeup tins, pried them out of the holders, and cleaned them out. I was going to slip a magnetic business card backing inside the tin and slide the containers in… but they didn’t stick. I thought then to attach magnets to the backs of the tiny tins instead but… right, they didn’t stick to the business card holder, EITHER. So, both surfaces received magnets. A tight fit, but it worked once I found thin enough magnets.

I added a little swatch card to the cover and allowed the paints to dry for the past week. [After accidentally shutting it like 6 different times and getting sticky paint all over the white surface (which, turns out, DOES clean up easily)]

Look how tiny this is! Too bad you can’t fit a teensy brush inside. I’d have eliminated a few colors to make that work.

Hopefully my little palette will love its new home. I’d be excited to receive this. I really enjoy the QoR paints, but the more I play with them and others, the more clearly I understand why traditional watercolor artists may not love them. I think trying them out as samples first is a great way to see what they are like before putting a lot of money into them!!

If she hates the paints (she makes her own, and they are lovely!) at least she can reuse the palette. 🙂

Travel paint set… (one of many :) 5/24/18

I thought I’d take you on a little tour of a traveling paint bag I have put together. I wish I could do a video tour of this for you!

The creation of this set involved a period of collecting tiny, unusual, but specific, bits. It starts with a little tin, about the size of a deck of cards, that I found at The Dollar Tree. I actually purchased two, and put the lid of one on the bottom of the other, painting all of the pieces inside and out (inside to provide a nice white surface on which to mix colors, outside just because I decided I didn’t like the way the tin looked), and the extra lid gives me an extra area to mix colors if I need it. (I saved the other bottom piece for a future project.) I used a plastic bracelet thingy to wrap around it if it gets too full, but it really doesn’t need it right now. It keeps it all together nice and tight, though, when I add a little sponge I have. Normally I use a wrist sweat band to wrap around it, and then use that as a towel for wiping my brush…  I’ve temporarily misplaced it but this is a great idea.  I keep a swatch of the included paints on the outside of the tin, and will probably create one of my most used mixed colors for the back, once I settle on a favorite selection of colors.

IMG_0719

Inside the tin I have:

IMG_0708

-6 full pans with magnets attached

-1 water brush,

-a round and a flat travel paint brush (actually the flat is a fingernail decorating brush I found really cheaply on eBay or amazon a while back, the round is a lovely one from Cheap Joes… their store brand) and a tiny winsor & newton travel brush

IMG_0705

(I know I don’t need all of these brushes… I just haven’t done it enough that I know yet exactly what I prefer. And it all fits, so…)

-2 little plastic fish full of water. Because they make me smile.

IMG_0706

-1 tiny round cup with a lid full of water (VERY small, from a travel container set at Dollar Tree)

IMG_0707

-a tiny mechanical pencil (I don’t have a photo, but it is the size of the travel paint brush when folded, very small.)

-a clip or two to hold the journal page open if needed, or to clip the set to the journal… these can be used a couple of ways

-sometimes I have a single silicone baking cup folded in there… it’s shaped like a cup cake liner… folds down flat and pops open to be used as a water cup. Right now I’m just using the teensy cup pictured above.

…and then the lid and the extra lid both serve as paint mixing areas.

Technically, I can just grab this tiny tin and a pad of paper and I have everything I need. It fits in a pocket easily. It’s plenty. I had seen a lovely leather bag I wanted,  which would fit a journal as well. To save myself $50,  I dug around in my closet to see what might work, and voila! Not leather. But bright and happy, and currently going unloved.

IMG_0711

A zip pocket in front, for whatever flat thing, paper towel, whatever… then the front flap lifts to reveal a pocket which holds my tiny watercolor journal and my pen. And another zipper pocket for my cash or debit card:

Inside the main zipper compartment I keep the tin I just showed you, with the paints, brushes, water, etc, plus another tiny tin with different erasers and a corner of a plastic gift card for making lines, and a little mister I have for wetting the paints… and there’s plenty of room for some extra little bottles of water if I think I’ll need them. (I have several of the travel shampoo bottle from the Dollar Tree set which are kept filled on my work station.)

And there’s still another pocket on the back if I need it! I can fit watercolor pencils in here, too, or colored pencils if I want them.

The paints are Daniel Smith and since they are magnetic pans, I can replace them with any of the other paints from my larger desk set, which holds a bit of each color I have, and is described in a recent post:

Right now this little travel tin holds Daniel Smith Carmine, Nickel Azo Yellow, Green Apatite Genuine, Phthalo Blue (green shade), French Ultramarine, and Sepia. I could easily fit 12 pans in once I narrow down my brush choice. Or more, if I want to keep the other supplies in my bag.

But wait until you see the tiny palette I made to send to someone… I’ll show you that tomorrow. I love it!!!! It’s so small. you’ll love it, too. And it was CHEAP to make. Everyone likes that.


Fuzzy Little Bird, courtesy of Iraville on Youtube (May 20, 2018)

I watched THIS youtube video by Iraville, one of my current favorite artists, and tried to copy her cute little bird. I couldn’t find my masking fluid, so had to try it a little differently.

The first one, on the right, used the wrong paints. Don’t use QoR for this. For the second, on the left, I found the proper paints (listed and linked below) , and it was a bit better, but not right. Cute, though. Third try, on the top… still not right. But I see progress. It’s a good, simple technique that I think I can do better, over time, and create my own cute little fuzzies. Also… paper makes a difference.

IMG_0721

By the way, the black here is not actually black (on tries 2 and 3), but Daniel Smith Bloodstone Genuine,  a very granulating paint made from… well, bloodstone, a rock also known as heliotrope. This is a GREAT paint. I’ve linked it above to Amazon, $14.26 for 15 ml, free shipping, for as long as the price lasts. It’s a pretty good price. (It’s about $2 cheaper at Jerry’s Artarama, but you have to pay shipping, making Amazon is a better deal, if you aren’t purchasing several other art supplies as well.) I’ve only really used the color for shadows before, and love it here. It was one of the first colors I found on my own (accidentally) and I hope to find lots of uses for it.

(There’s only one 15 ml of Bloodstone with that seller at Amazon at that price right now…HERE is a 5 ml tube of the same color, currently $6.41, plus $1.99 shipping)

Look at that granulation!

IMG_0722

That bright red tummy you can tell is QoR, with it’s tendrilly edges… You can use any paint, but I liked the Schmincke and Daniel Smith better for this.

To make the birdie, you lightly pencil in the general shape. Then use masking fluid to block the eye, brush water across the page, dot in the red (Schmincke Horadam Cadmium Red Light, 5 ml tube, or half pan.) and the Bloodstone, and let them do their thing. Use a dry-ish brush to clean up the edge when they get too carried away.

Watch the video… she explains it really nicely. And it is a relaxing exercise.


‘Homemade’ paint box, can hold 140 full pans!… and a new color swatching journal! (5/19/2018)

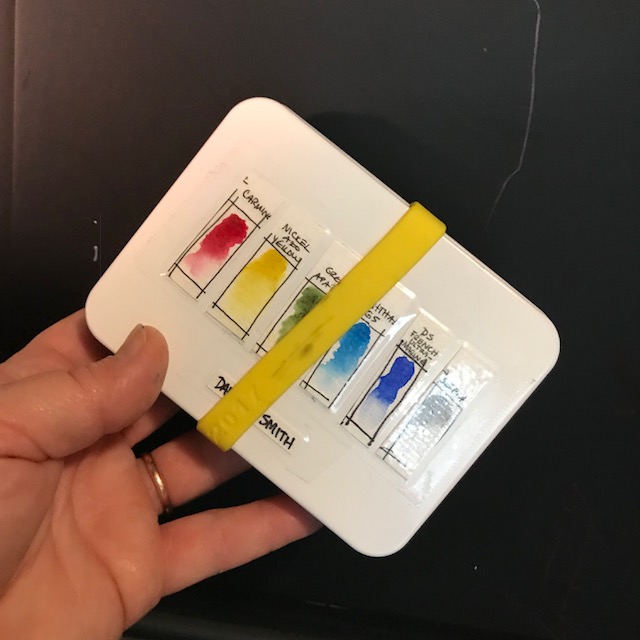
You know I’m always looking for ways to organize my paints. I saw this idea on youtube HERE, on In Liquid Color’s channel, and she had gotten the idea from Arleebean’s channel. It seemed like a great inexpensive way to organize a lot of paints, some of which I never use because they aren’t in pans, or aren’t accessible. I got 95 pans into mine, and have room for ten more, using two layers… I prefer using full pans, but if I were smart I’d switch to half pans and double my capacity. I also have a third layer I may add… yes, this 8″x8″x2″ box can hold 140 full pans the way I have it set up!! (or 280, if I were smart enough to use half pans. But I prefer full sized pans)

Step by step:

I purchased a slim wooden 8″x8″ box from Michaels, for under $5, and an $8 can of white enamel spray paint, discounted to $2! I taped the hardware and the edges of the box, then sprayed several layers of white inside. (I also used this can to spray inside multiple tiny tins, creating a white enamel surface for mixing colors. I made a REALLY ADORABLE teensy travel palette this way, which I will show you in another post!)

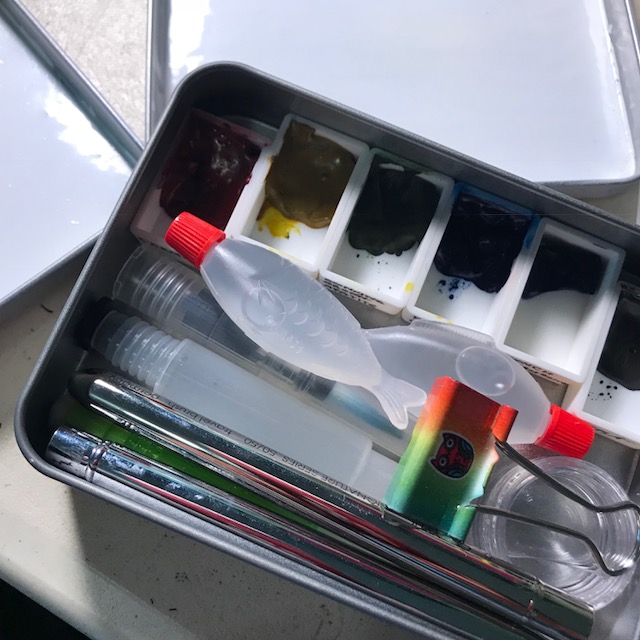
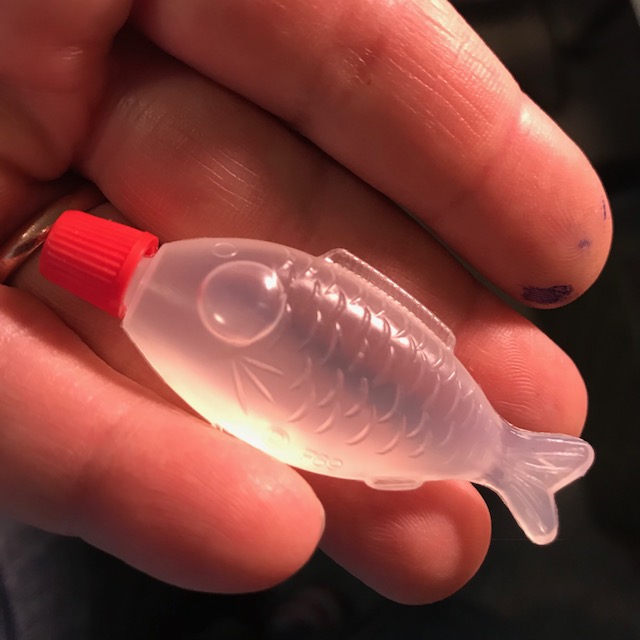
I was going to stain and polyurethane the outside, maybe draw a fancy design on it, and then decided just to spray paint it. I taped anywhere I didn’t want sprayed. I ended up roughing up the edges a bit, too, when it was all finished, but don’t have a photo of that. I was going to purchase an 8×8″ magnetic vent cover from Amazon (under $5), but then remembered these business card sized magnets… not as pretty… but free. Making them PRETTIER.  Each pan has a tiny thin magnet applied as well. This way, I can use them in my small metal tins as desired.

The bottom of the box will hold paint, the top can be used as a makeshift easel space, or a mixing area, or to hold the swatch cards. This will sit right on my workspace… no excuse not to paint, right???

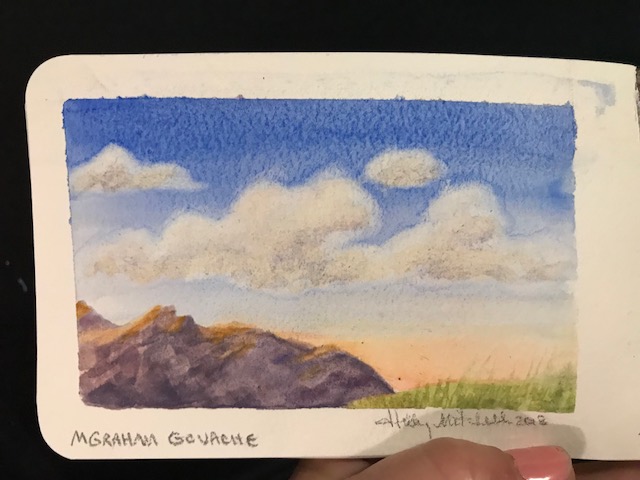
That bright orange makes me smile.

I arranged all of my Daniel Smith, M Graham, and Winsor & Newton colors in the bottom. Next I sprayed (white) the inside of both top and bottom of a slim tin I found that happens to fit inside the box. Ta-da! Second layer. Fits perfectly. And in went QoR paints.

I have kept my Schmincke in their original tin because it is simply amazing. And haven’t included a few other brands that frankly I don’t like as well, but I may do a third layer for those. For a total of 140 possible full pans. (or 280 half pans)

Next I swatched all of the paints in order, including opacity and lifting tests. [side note: you can see the QoR set FAILED lifting miserably. I tried lifting a horizontal stripe towards the bottom of those samples. The other sheet I lifted vertically. I still love these with all my heart… but I am starting to see why traditional watercolorists don’t always embrace them. They do some things wonderfully… I think the more illustrative styles work great with them. But they don’t lift well, and even salt reacts strangely with them, I’m finding! (I’m starting an intensive swatch book with all of my colors. It’s eye opening!! I’ll give you a quick peek further on)] In time I will create a movable swatch storage, so I can adjust as the palette grows, or changes, but these pages are fine for now.

On the swatch card, you can see the Daniel Smith paints at the top, the section bordered by red, M Grahams in the bottom left corner, bordered by green, and my least favorite, Winsor & Newton bordered by blue in the bottom right (but hey, maybe having them so accessible I’ll start using them and fall in love, right??) I don’t mind that I have repeats of some colors over multiple brands… comparing those is how I’m learning which brands suit my needs most.

I will likely add my Sennelier and White Nights to the third layer.

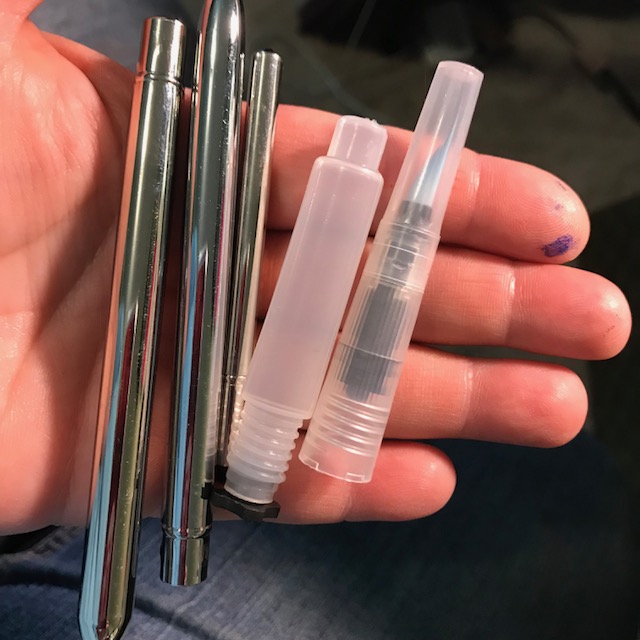
I figured I can remove any number of paints I want to use at any given time, 3, 6, 12, etc, and put them into any of my smaller tins, for easily edited working palettes, or I can work right out of this box.

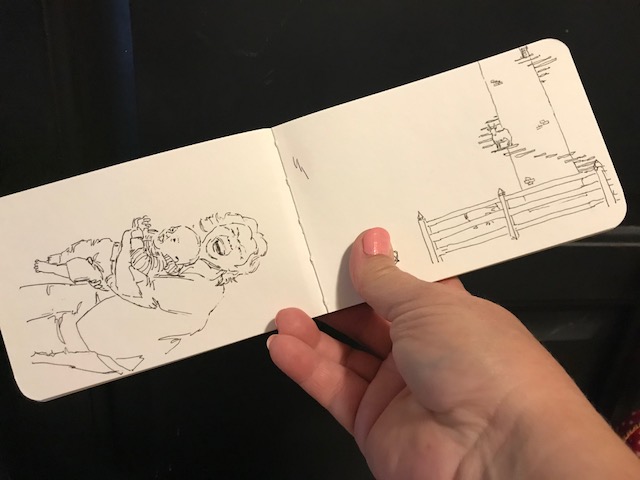
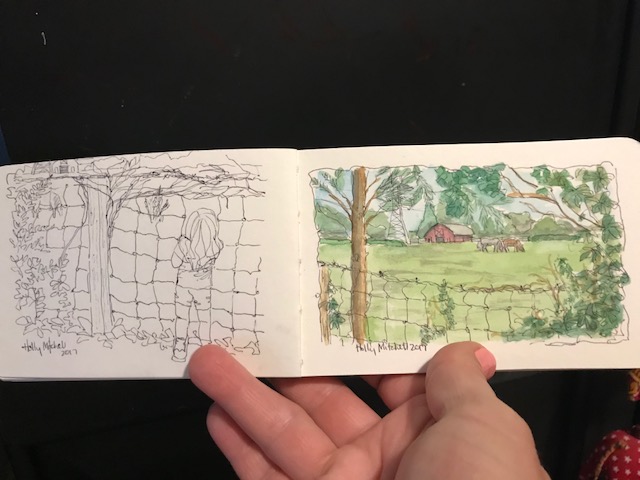
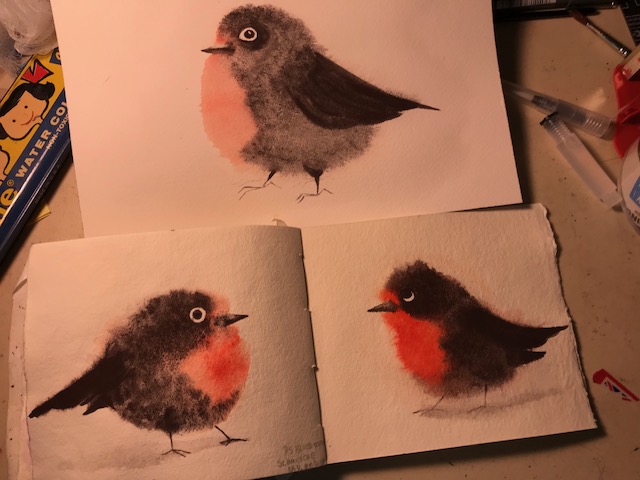
Here’s a quick shot of my first color swatch pages. I got the swatching ideas mostly from youtube “Sadie Saves the Day”   and “In Liquid Color” .

IMG_0751

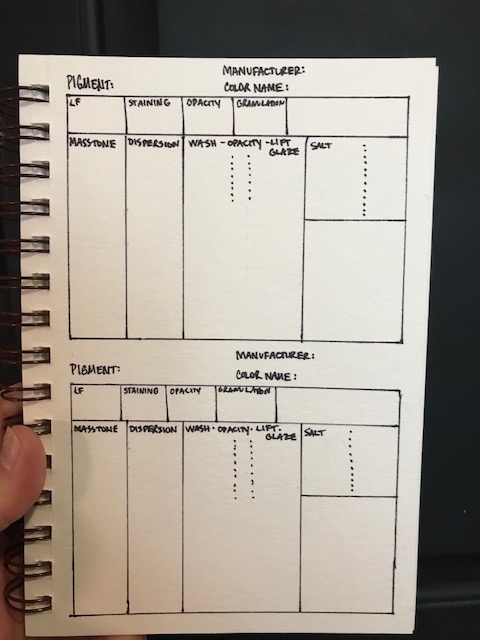
I list pigment number, manufacturer, and color name… below that, lightfast ratings, staining, opacity, and granulation information, an empty box (because there’s always something else, isn’t there??). Below that, a stripe for a dark swatch “mass tone”, then a stripe to see the dispersion, a larger area to make a gradated wash, and to observe opacity, lift, and glazing qualities. Then a final strip to test the paint with salt or other effects.

I haven’t completed these pages yet, and I forgot to put my black stripe on the page on the left and had to add it afterwards. but you get the idea… the left page is QoR, the right is Daniel Smith, the same two pigments. Amazing how different they look and act! I have observed plenty of swatching videos, but doing it myself is really giving me a feel for each paint.

Originally I thought I’d keep each brand in a section together. But after I finished two pages of QoR paints, I saw that it might be more useful to do similar colors from all brands together. This swatching thing will take me a long time. Let me know if you’d like to see other colors I end up swatching (I hope to do them ALL), or maybe specifics you’d like to see compared. Also, check out both of those youtube channels for some very helpful swatching and comparison video series, and a color showdown series by Oto Kano there on youtube as well. (Can you tell how I’ve spent my free time this week? I’ve watched a lot of youtube.)

What do you think of my paint box, and my swatch journal? What do you use? Do you have suggestions? Let us know in the comments!

Wonder Cow! (paper doll outfit) 5/12/2018

I’ve already shown you the card I drew for Mothers Day Storytime at the restaurant… I almost forgot to draw a new paper doll outfit…  The mild mannered Cow mascot can now dress as Wonder Cow any time there’s trouble nearby!

IMG_0626

Now we have The Cow Paper Doll (pardon me… The Cow PAPER ACTION FIGURE!!), a St Patrick’s Day outfit, a beekeeper’s suit and accessories, and a super hero costume.

IMG_0627

The kids loved storytime today, and so did the moms!! They liked knowing their Cows would have more outfits later, too.

Best Storytime yet!