Day 73 B: (tues 3/14) my petite travel paint set

I wanted a tiny convenient paint set for taking with me anywhere. I keep seeing them on youtube and in artist’s blogs and they are so cool. I don’t need this, for two reasons. I have small travel palettes already. And I don’t take paints anywhere and paint. I do WANT to, though, and I wanted a really small one (for no reason that makes any sense. Just to see how small a set I could get, I think), so I made myself one last night.

I used a round little tin (about 3″ across) I found while cleaning out my studio. I was thinking I’d used 3 or 4 colors in a travel set, but I fit 8 windsor & newton cotman 1/2 pans in there. I cut down two of my cheapest paint brushes, a round and a flat, to 2 3/4 inches, and sanded the end I cut, (and plan to dip that cut end in acrylic paint or clear nail polish or something to keep it safe from water) You may notice the round brush is actually cut to a slanted end, the tip of which I think I can use for lines in the paintings. I also cut down a pencil, and included a tiny eraser from my electric eraser set. I’m not worried about using these very short tools if ever I’m out, and I also have a pencil extender in my watercolor pencil set, which will make them even easier to use, I think. Also, we are workshop challenged in our family (sad because dad was a workshop genius) and have no tools. So I used a safety jack o lantern cutter for the brushes and pencil (making me wonder, are they really that safe?), and a nail file to sand them dow. Perfect. I feel so self reliant.

(All that work… and there’s a little collapsible Da Vinci brush I’m DYING to buy. Several, actually.)

I added magnets to the backs of each 1/2 pan and they fit perfectly around the edge of the tin. I added magnets to three little metal pans from my new Artbin palette, placed one in the center of the paints, and two in the lid of the tin. These will be for mixing colors, which I can also do in the lid of the tin. OR i can use the tin lid or tin itself to hold water!

I put the brushes, pencil, eraser, and one folded up paper towel inside the tin, put the lid on, and added a tiny laminated swatch I’d made of the paints, which will help me remember what’s in there if I never use it.

FullSizeRender

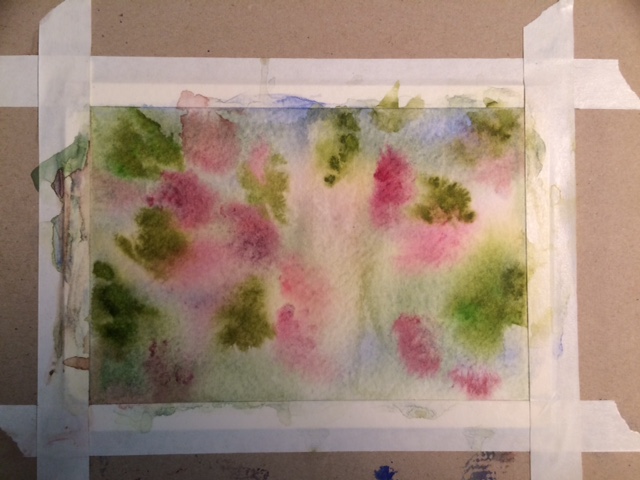
(those brushes were white once)

I have a tiny bag that a friend on Swap-bot made for me a while back, which will hold my palette, pen, a tiny collapsible metal cup for water, a couple 2×3″ pieces of watercolor paper… to test paint colors… and my pencil extender. I know, I know… If I’m taking a little bag anyway, do I need such a small palette? Wouldn’t my slightly larger professional palettes work as well or better? uh… yeah, probably.

But, this will be fun. I think I will add another large flat magnet on the bottom of the tin, so I can attach the tin to my sketch book if I need to, and a clip to keep pages from blowing if I am outside.

And I’ll have no excuse not to go sit at Starbucks and paint. Sipping my chocolate frappuccino, nibbling on madeleines. Nice. Pocket sized painting fun, created with things I already had here and wasn’t using. And I get madeleines.


Day 73 A:(Tues 3/14) watercolor Tim Wilmont tutorial # 18

Well, I didn’t follow his tutorial at all, but used his photo to try something on my own. This is a corner in Covent Garden in London, where I have actually been!! I tried it in Peter Sheeler’s style. It doesn’t look like Sheeler’s stuff, and the colors are all muddy, so I’m not terribly happy with most of it, but I think the perspective is much better than my first attempt on Sunday’s submission. I may try to follow Tim Ailment’s painting directions, his style is loose and pretty without the pen and ink. But also scary, and I don’t have the colors he has. (and without ink it IS all about the color) I used a new travel paint set I put together, which I’ll create a separate post to describe.


Day 72:(mon 3/13) watercolor, pen and ink sketch

Followed a Sheeler tutorial called “pen and ink sketching on painted paper adding white highlights.” Which pretty much says it all. I painted the paper, I drew the sketch, I added white ink highlights. It DOESN’T say, however, that I had my day numbers all messed up all week! So had to go back and adjust them all. (Had you noticed?)


FullSizeRender

Day 71: (sun 3/12) watercolor and pen

So I borrowed Peter Sheeler’s style for this one… and without his tutorial it was crazy hard!! I had to do it twice, my perspective was so skewed the first time. I edited the photo on my computer to add grid lines and tried again. It’s better, as you’ll see. But not Sheeler-good. I hate to post my crooked one, but I will for transparency’s sake! (But see how I kept it smaller? I HAD to. It pains me so to post it!) Even with the grid I was still off. But I figured it’s my interpretation, not a photo. (right??) I think the biggest weakness of mine, really, is the lack of light. The light in the photo is gorgeous, and I totally missed it.

I used a new set of brushes I’ve been asked to review, for this painting and the past day or two’s. I will post my review of them soon.

(PS biggest thing I learned today… if I’m having trouble, don’t be afraid to cheat. It isn’t really cheating. All’s fair in love, war, and art)


day 69: (fri 3/10) new paper, new paint!!

So today I’m working on new paper – WHICH I LOVE!! Yeah, paper makes a big difference, it turns out. I’m not suddenly a better painter. But it is more satisfying to use, that’s for certain. I’m using a “windsor & newton artist’s watercolor paper” spiral bound pad, 140 lb (so nice and thick), cold pressed (which means the surface will be textured… hot pressed makes it smooth), made from 100% cotton. It’s only 12 sheets, so it is more expensive than my canon xl pad. And they are both 140 lb, but this one just feels better. And the water loves it! I’m ordering more. (I got these at Jerry’s Artarama, see link)

FullSizeRender

I’m also using new M Graham watercolor paints. (Oooh, I love them.) I received two in this month’s Artsnacks subscription box, which really surprised me, because I had just decided after much heart wrenching research and deep anguish to invest in those, and had ordered four on my own. So now I have five. I know, that math is off. I’m not great at math, but I am better than THAT. Of the two I received in my subscription box, one is white, which I don’t really count as a color in my palette, although I’ll probably use it sometime.


I purchased the paints and an Artbin slimline magnetic palette at merriartist.com (see links). The palette is just what I wanted, and it only cost $6.50! It holds up to 18 one inch square pans to hold the paints, which are purchased separately at under 50 cents each, and is magnetic to hold them in place (it can be used without the pans for pins, cutting blades, etc, if preferred). Typical watercolor sets come with very tiny half pans. Deep but small, and I want more room for bigger brushes, or for mixing in the wells. Even full pans aren’t very large (although they are deeper) These pans are quite shallow, but large enough for bigger brushes. And you can mix paints in the clear lid, if desired (I much prefer using my ceramic dishes to plastic, though) The only way it could be better is if the pans were deeper.

So I have (from the bottom up) ultramarine, hansa yellow, quinacridone rose, scarlet pyrrol, and terra rosa. And besides those five colors, look what I can do just playing around:

IMG_4589

Quite a nice, emotional, earthy bunch, huh? Very rich. I only really want another blue and yellow, or two, and a red, and I will have a huge palette. And with just those colors I have now, I painted my flower…


I’m one of those irritating people never satisfied with less. But I’m finding less is better as far as my color choices.


Day 68: (thurs 3/9) another sunflower

Attempt two, without the tutorial. This one is specifically for a swap. I have these three keen little “machines”, the Xyron 510, the Xyron Creative Station, and a small Xyron 1.5 inch sticker maker… they can hold different cartridges (I think the littlest one only makes stickers)… to make magnets, permeant or removable stickers, and laminate items. The large one currently makes stickers, the medium 510 laminates. They take only a few seconds to work and are some of my favorite tools. So I ran this painting through the laminator and now have a handpainted bookmark ready to go! (Now I’m wondering if I let it dry long enough before I laminated it)


IMG_4584


Day 67: (wed 3/8) Debbie’s birthday

Because, in typical fashion, I did not get a card out to my sister for her birthday, I chose one of her favorite themes for today. Here’s what it could have looked like, Debbie. Happy birthday!

To be honest, I didn’t understand really where we were going with this tutorial until it was too late, but I learned some interesting techniques and a much looser watercolor method, using layers, lots of water, and negative space. (there were so many layers here!) I hope to try this one again, either the same thing or a similar image. I like it, but I can do better, especially now that I know where it was going. I think.

Day 64: (Sun 3/5) watercolor raspberries. yum!

So, I tried this tutorial 4 times. (look in the “featured image” on this page and you will see where my tape tore one of the bottom corners of the paper) I’m not particularly satisfied with any of the results, but did learn several interesting techniques, and there are bits of each one that I like. One technique involves actually damaging the paper for the highlights in the berries. (and you thought it was a white pen. No, it’s a SCRATCH…!??) Another involved a pencil eraser used as a paint stamp. And there was lots and lots of water.

The first couple of steps…

fullsizerender

The raspberries are cute. These are little pictures of all the different attempts.

Day 63: (Sat 3/4) watercolor sunset over water

Yeah, another tutorial. Get used to it… I’m planning to paint my way to the end of the internet. (Or to the end of internet tutorials that interest me, at least. There are a lot.)

So I have two attempts here. Both have serious flaws. But really the paper is my biggest weakness right now. I’m using what I now understand is a student grade paper, and you can see on one of the paintings how it’s even pilling a bit. It’s fine if you only use a bit of water but not great for heavy washes or multiple runs of color.

img_4480

So I’ve finally decided to invest in some good quality paper and see if it makes a difference. You can see on my first attempt I had trouble keeping the paper wet, and I was working very quickly. So between dry paper and pilling paper, cheap brushes, and student grade paints… I’m going to begin upgrading supplies over the next few weeks, as I can. (I’ve already spent weeks trying to make decisions about paint brands to begin with!! They are so expensive, I don’t want to regret my first quality purchase!!)